Add Bleed to PDF for Print Sheets
Set up PDF bleed for printing with artwork already in your file. Follow the 0.125-inch example, check trim marks, and download your arranged print sheet.
Upload your designAdd bleed to PDF print sheets using your existing artwork
To add bleed to PDF print sheets in PrintGrid Pro, upload your design and set the Bleed amount under Trim Guides. The app uses artwork already inside the uploaded file: it moves the cut inward, leaving an outer strip to trim away. It does not enlarge the design, mirror its edges, or create missing background. You get a new PDF sheet with your arranged pieces and selected cutting guides. If your PDF stops exactly at the intended finished edge, extend the background in your design tool first, then upload the prepared file.
What bleed means and when you need it
Bleed is background artwork that continues beyond the finished cut. It gives a small cutting shift somewhere to land without exposing an unprinted white strip. A common US standard is 1/8 in, or 0.125 in, on each edge; follow your print provider's requirement if it differs. Edge-to-edge invitations, photos, business cards, and colored tags usually need it. A design with an intentional white border may not. Bleed belongs outside the cut, while names, dates, logos, and other important details belong safely inside it. Crop marks show the cut position; they do not supply the extra artwork.
1. Upload a PDF with background beyond the cut
Select Upload your design and sign in when prompted, then choose the PDF from your device. Start with one design rather than a whole sheet of cards. Check the imported size in inches before changing anything. Our example file measures 5.25 x 7.25 inches including background that will be trimmed away. After a 0.125-inch allowance on all four edges, the finished invitation will measure 5 x 7 inches. Keep the original file separately. Avoid extra white margins or existing crop marks around the source, since these can become part of the area being arranged.
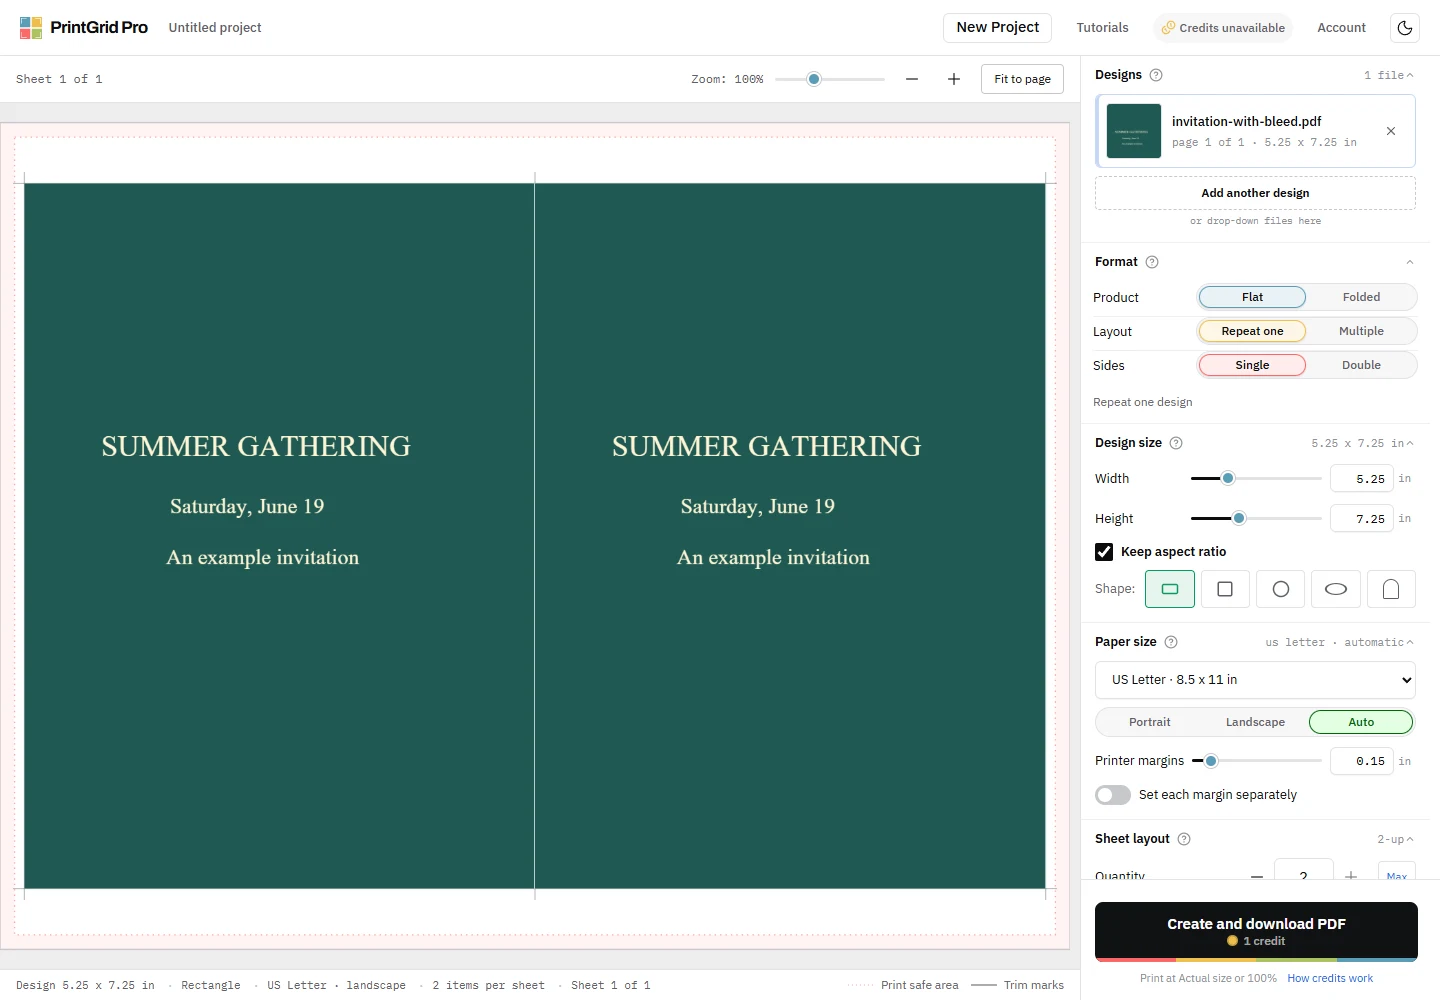
2. Select Letter paper and enter the bleed amount
Choose US Letter, 8.5 x 11 inches, for this example. Under Trim Guides, enter 0.125 in the Bleed field. One amount applies to every edge. The inch control starts at zero, offers adjustments in 0.005-inch steps, and has a displayed maximum of 0.5 inch. The amount must leave a positive finished width and height. Check Design size after the change: our 5.25 x 7.25-inch source now shows 5.00 x 7.00 inches. The artwork's outer footprint stays the same. Setting Bleed back to zero removes that inset and restores the outer dimensions as the finished size.
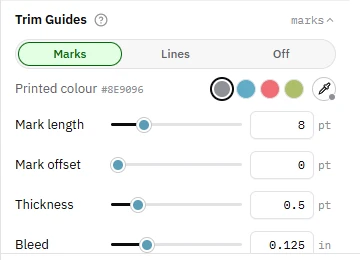
3. Choose cutting guides and inspect the edges
For a rectangular invitation, choose Marks for short corner guides, Lines for a full outline, or Off to omit cutting guides. These are separate choices from the bleed amount. Marks also have length and offset controls in points; those measurements do not set your bleed. In the preview, check that the cut sits inside the background and outside every detail you need to keep. The outer strip will be cut off. If a face, border, or line of text falls in that strip, prepare a safer source instead of assuming the app will reposition the content.
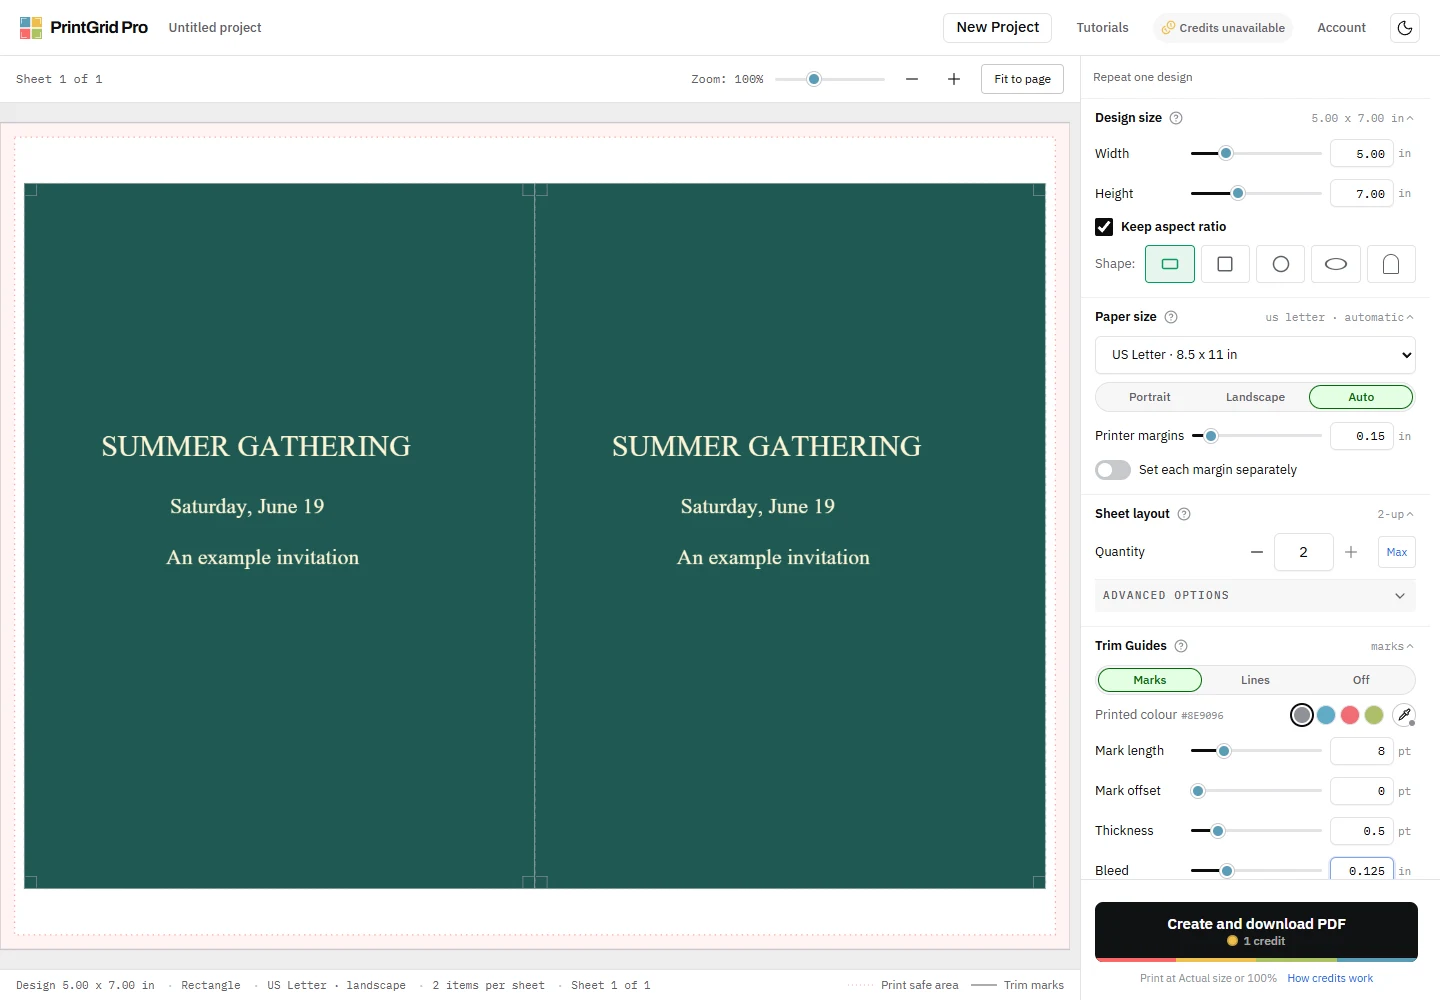
4. Check the sheet before creating the PDF
Review printer margins, the gap between copies, and the total quantity. The white paper around the arranged designs is printer space, not extra bleed. Use margins your printer supports and enough separation for your cutting method. Inspect all pages, especially a partially filled last sheet. Confirm both the finished dimensions and the selected guides before choosing Create and download PDF. The output is an arranged print sheet, rather than a replacement design document. Keep your source if you will need another size later. Changing the bleed setting does not improve image resolution or remove white areas already in the artwork.
5. Print at 100% and trim a sample
Download the generated PDF and open it in a suitable PDF application. Select the matching Letter paper and print at Actual size or 100%. The sheet already contains the arrangement, so print one PDF page per paper side. Start on plain paper, follow the cutting guides, and measure one finished piece. Our example should finish at 5 x 7 inches after trimming away 0.125 inch on each edge. If it is smaller, check viewer and printer scaling. Check the background at every cut edge before continuing with your intended paper. Printer feed and cutter movement still affect the physical result.
If your PDF has no spare artwork
Adding a bleed value to a 5 x 7-inch source makes the finished cut 4.75 x 6.75 inches at 0.125 inch per edge. It does not turn that file into a 5 x 7-inch card with newly extended background. To keep the full finished size, return to your original design, extend the background, and export a source that includes the allowance. For Canva artwork, follow the preparation guide below and inspect the exported PDF before importing it. Use the bleed and trim guide to understand the boundaries, or the crop-marks page to focus on cutting guides.
Frequently asked questions
Can PrintGrid Pro extend the edges of my PDF?
No. The bleed control uses artwork already in your file and moves the cut inward. Prepare missing background in your design tool before uploading.
How much bleed should I use?
A common US allowance is 1/8 in, or 0.125 in, per edge. Use your print provider's requirement and confirm that the uploaded artwork includes that allowance.
Will adding bleed change the finished size?
Yes. With 0.125 inch of bleed, the cut moves inward on each edge. A 5.25 x 7.25-inch source becomes a 5 x 7-inch finished design without enlarging the artwork.
Do I still need crop marks?
Bleed and crop marks do different jobs. Select Marks when you want corner cutting guides, or Lines for an outline. Bleed alone does not tell you where to cut.
Adobe's guide to PDF print scaling
Ready to arrange your sheet?
One successful output page or side uses one credit. An eligible new account receives three one-time trial credits; the trial does not renew.
Upload your design